| Home | |
| Fossil | |
| None More Black | |
| Lego Inside | |
| Lego Case | |
| Overclocking | |

 I think my wife is starting to suspect something. She paged me at work today in the middle of a meeting. When I called,
she said, "Did you order something from etoys?" I assured her that I did, but she asked again, "What specifically did
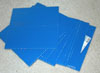
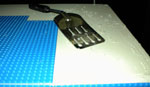
you order?" I explained that I ordered 12 10" blue Lego baseplates. There was a pause, then a response,
"Oh. Do you want Sam and I to go away for a couple days?"
I think my wife is starting to suspect something. She paged me at work today in the middle of a meeting. When I called,
she said, "Did you order something from etoys?" I assured her that I did, but she asked again, "What specifically did
you order?" I explained that I ordered 12 10" blue Lego baseplates. There was a pause, then a response,
"Oh. Do you want Sam and I to go away for a couple days?"
I think that's the beginning of understanding, or at least acceptance. Perhaps she equates it to a drinking problem or something.
1-27-01
 I came to the conclusion that I wanted the case on its side. Sure, that makes the CD-ROM sideways, as well as the floppy
drive. The main advantage is that it gives more surface area to attach Legos. I mean, if you're going to make a case
out of Legos, you might as well use it to its fullest.
I came to the conclusion that I wanted the case on its side. Sure, that makes the CD-ROM sideways, as well as the floppy
drive. The main advantage is that it gives more surface area to attach Legos. I mean, if you're going to make a case
out of Legos, you might as well use it to its fullest.
1-28-01
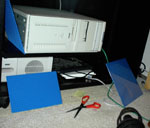
I spent a long time just moving the baseplates around. Measure a dozen times, cut once. I decided to keep as much of the original case as I could. My last experience trying to create a case from scratch left me wary of such endeavors. I started with the front, which was the hardest. Amazingly, I cut it to size with a pair of scissors. Very easy to cut straight lines, too. I also needed to cut or drill holes through the baseplate in a number of places - the CD drive, the floppy drive, the power switch, the hard drive light, and the reset switch.
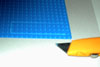 Starting with a hole for the floppy, I slowly cut a square in the baseplate. It took a long time, and I discovered
that the thin plastic becomes easily discolored due to stress. So, the solution was to slowly go over the grooves
until I broke through. Next were the holes for the lights and switches. I started with a small drill bit, then worked
my way up in size. My main problem was that the holes didn't align perfectly with the Lego bumps. So, more slow going.
Starting with a hole for the floppy, I slowly cut a square in the baseplate. It took a long time, and I discovered
that the thin plastic becomes easily discolored due to stress. So, the solution was to slowly go over the grooves
until I broke through. Next were the holes for the lights and switches. I started with a small drill bit, then worked
my way up in size. My main problem was that the holes didn't align perfectly with the Lego bumps. So, more slow going.
 Next step was to create buttons and covers for the lights and switches. Fortunately, my son's Star Wars Legos were handy,
and I'm hoping that since he's only two, he won't notice the missing parts.
Next step was to create buttons and covers for the lights and switches. Fortunately, my son's Star Wars Legos were handy,
and I'm hoping that since he's only two, he won't notice the missing parts.
1-29-01
 Disaster strikes. The top panel was misaligned and had to be removed. Part of the front panel came loose when moving it around - it caught on the edge and peeled away. I'm finding that silicon glue doesn't stick very well to the plastic baseplates. I'll need to rough it up with sand paper and try again. I spent the next couple days scraping off the dried silicon with a spatula. Tedious and frustrating work.
2-3-01
I've scraped off some of the dried silicon glue, sanded the back of the baseplate, and glued the top baseplate down again. I'm using Legos to help prevent misalignment, sticking the top right baseplate to the well-glued top left one. Works like a charm.
2-4-01
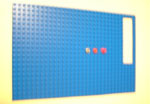
 Things progressed pretty quickly today. I cut out and glued down
a couple more baseplates, finishing up the top. I've been stacking old college textbooks on them for weight
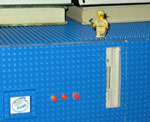
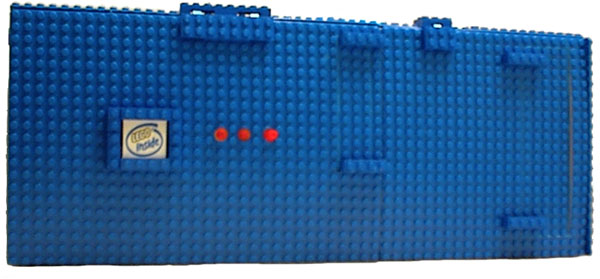
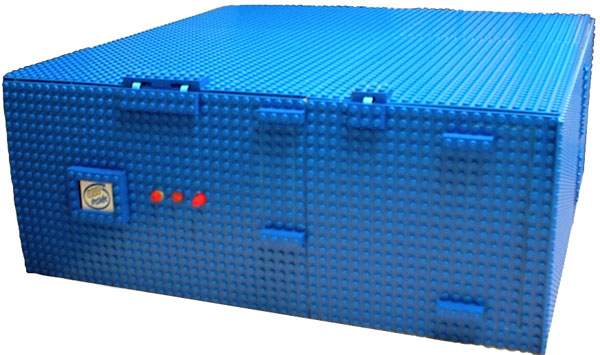
(such is the value of higher education). I also made a little "Lego Inside" logo. I'm sure the combined Intel/Lego Gestapo
will try to get at me, but I'm not one to cave in to jackbooted thugs. Oh, and if you're wondering about the little
Lego guy on top, he's the mechanic from the B-Wing Star Wars Lego kit.
Things progressed pretty quickly today. I cut out and glued down
a couple more baseplates, finishing up the top. I've been stacking old college textbooks on them for weight
(such is the value of higher education). I also made a little "Lego Inside" logo. I'm sure the combined Intel/Lego Gestapo
will try to get at me, but I'm not one to cave in to jackbooted thugs. Oh, and if you're wondering about the little
Lego guy on top, he's the mechanic from the B-Wing Star Wars Lego kit.
2-6-01
 I finished up the bulk of the work today. The top and side panels are glued down. I created some Lego "straps" to hold
down the seams. Tricky work, as the standard Lego lengths weren't long enough. I had some spare baseplates, so I
used the diagonal between the divots, which turned out to be exactly the right length. Good ol' square root of two.
I finished up the bulk of the work today. The top and side panels are glued down. I created some Lego "straps" to hold
down the seams. Tricky work, as the standard Lego lengths weren't long enough. I had some spare baseplates, so I
used the diagonal between the divots, which turned out to be exactly the right length. Good ol' square root of two.
 I'll probably do some additional work on it as the weeks go on.
The CD and floppy doors are tricky. It probably makes more sense to simply stick them on with Legos, rather than
try for a door-hinge approach. The problem with all the hinges I've tried is that it's not sturdy enough.
I'll probably do some additional work on it as the weeks go on.
The CD and floppy doors are tricky. It probably makes more sense to simply stick them on with Legos, rather than
try for a door-hinge approach. The problem with all the hinges I've tried is that it's not sturdy enough.
Back to case modifications


Large Top Image
Large Front Image